Here is a Crash Course on COMSOL/FEMLAB which is also offered at NADA-KTH for the Beginners by Prof Michael Hanke.
Comsol Multiphysics is an integrated environment for solving systems of time-dependent or stationary second order in space partial differential equations in one, two, and three dimensions. Moreover, such equations may be coupled in an almost arbitrary way. Comsol Multiphysics provides sophisticated (and convenient) tools for geometric modeling. Therefore, for many standard problems, there exist predefined so-called application modes which act like templates in order to hide much of the complex details of modeling by equations. The application modes make use of the language used in the respective engineering discipline.
For our purposes, it is sufficient to work with the
core equation model because we do not need to use the advanced features of Comsol Multiphysics. There are two forms of the partial differential equations available, the coefficient form and the general form. They read
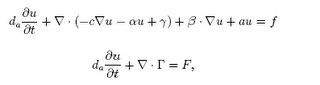
respectively. We will stick to the coefficient form. It can only be used for mildly nonlinear problems. For most nonlinear problems, the general form needs to be used. The coefficients of the coefficient form may depend both on x, t, and u. Observe that a dependence on u is not recommended.
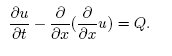
1.) Example. As a running example take the one-dimensional heat equation
Here we have d a =1, c =1, f = Q, and all other coefficients are vanishing.
Starting Comsol Multiphysics
Comsol Multiphysics is available on all supported platforms. Under Solaris or Linux, issue the command
> module add comsol
in order to get access to the system. If you are using Comsol Multiphysics in other installations, please follow the instructions coming with the installation CD. In order to invoke Comsol Multiphysics, go to a directory of your choice and run the command:
> comsol &
You will be confronted with the Model Navigator. Here you can select the space dimension of the problem (1, 2, or 3), the application mode, the name of the dependent variable(s) (this may be more than one if you have a system of equations), and the type of the finite element to be used. I recommend that you do not change the name of the application mode. The Multiphysics button leads to the more advanced features of Comsol Multiphysics.1 If you want to load your own model, press OK without selecting a new application mode.
Example. Let us continue with our heat equation. We set the space dimension to 1D. Even if there is a predefined application mode for the heat equation, we will use the coefficient form for demonstration purposes. So select
Comsol Multiphysics --> PDE Modes -->
PDE, Coefficient Form --> Time-Dependent Analysis
On the right-hand side of the window, the form of the equation will be displayed. Do not touch all other parameters. The name of the unknown function will be u while the independent variables are x and t.
Define your problem
After you have accepted your choice in the Model Navigator, the main window of Comsol Multiphysics will appear. Its main contents is the a graphics window displaying the domain under construction (of course, it is empty in the beginning). The menu contains the main steps to be taken in obtaining a solution. Below the main menu, there is a button line providing shortcuts to the most important submenu items. If you stop with the mouse over a button, a bubble help will appear. As a rule of thumb, you have to traverse the main menu (or the button line) from left to right. In the Filemenu, you can save your project at any time, and reload it if you want to continue. 1Indeed, multiphysics is one of the main strengths of Comsol Multiphysics!
Options
In the Options menu, you can define some global settings. The most important points are probably
• Axes/Grid Setting: Here you can define the area to be displayed in the graphics window.
• Constants: Very often, a problem contains a lot of parameters. Here, you can define them. They are later available in the physics modeling.
Example. Define the strength of our heat source:
Options --> Constants
In the Name field, enter Q. In the respective Expression field, enter 1e2. Now, choose
Options --> Axes/Grid Settings
Enter xminand xmaxas -0.1 and 1.1.
Draw
In the 1D case, this menu contains only a few entries. I recommend to define the domain by hand rather than using the mouse.
Example. In oder to obtain the domain =[0,1], choose
Draw --> Specify Object --> Line
Insert 0and 1into the dialog box.
Physics
This is the place where you define the equation as well as the boundary conditions. For all coefficients and initial guesses, you can use mathematical expressions with a MATLAB-like syntax. Many mathematical standard functions are available. Use simply their MATLAB name. If you should obtain an error about an undefined function, you should try to replace it by equivalent expressions if possible. Otherwise you to have to run Comsol Multiphysics in a MATLAB environment
The first menu item is the definition of the boundary conditions. You have the choice of Dirichlet and Neumann-type boundary conditions. Robin boundary conditions may be inserted using the Neumann boundary condition case. If you started the dialog, you will find a numbered set of boundary pieces. If you select one of it, it will be highlighted in the graphics window. Specify the boundary condition for that part of the boundary on the right-hand side. Cycle over all boundary pieces until you are done. The denotation used is specified in the headline.
The next step consists of defining the differential equation. Select the Subdomain Setting dialog box. Again, a list of subdomians is presented.4 Select it, and you can assign the expressions for the coefficients. A reminder about the denotation can be found in the headline. Note that there are different tabs available. Besides the Physics tab, you will need the Init tab. For time dependent problems, the initial value must be defined. If you have a nonlinear problem, an initial guess for the nonlinear solver should be provided here, too.
Example. Assume that we have Dirichlet boundary conditions at t =0 and Neumann boundary conditions at t =1. After selecting
Physics --> Boundary Settings
select boundary 1 by clicking on it. The left boundary point will be highlighted in red. Choose Dirichlet boundary conditions. Do the same with boundary 2 but use Neumann boundary conditions.
The next step consists of
Physics --> Subdomain Settings
Select subdomain 1 (there is only one), and the line will be indicated in red in the graph. In tab Physics, all coefficients have already their correct values with the exception of the right-hand side. Insert Qinto the dialog box near f. Remember that Qwas a constant defined in the options setting. Go to the Init tab. You may insert an expression for the initial condition. Let the proposal 0 alone, this is equivalent to u(t =0,x)=0.
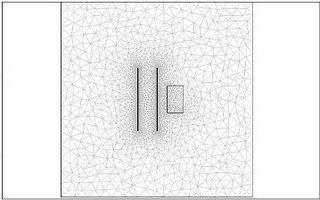
Mesh
Click on the mesh button to create an initial mesh. It is often rather coarse. Use the refine button until the mesh is sufficiently fine. Note that, for stationary problems, you have the possibility to choose an adaptive solver which will generate a problem-adapted mesh according to your criteria.
Solve
Here, you can select the solver to be used and the solver parameters. This is accessible under the menu entry Parameters. Usually, all parameters have already reasonable values. The only exception may be the time-dependent solver where you have to adjust the interval for solving the problem as well as the output points. Then solve the problem! Some output of the solvers is available in the log window. After a shorter or longer while you will5 be switched automatically into the Postprocessingmode. If you are interested in knowing what is going on, choose View log from the Solve menu.
Example. Select
Solve --> Solver Parameters
Enter the values where you want to have the output in the Times field. It is convenient to use MATLAB’s colon notation, for example, 0:0.01:1.5. This will provide solutions for times between 0 and 1.5 with an increment of 0.01. Save it and solve the system.
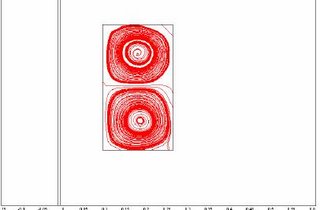
Postprocessing
The Postprocessingmenu contains a lot of graphical output routines. Moreover, derived quantities can easily be computed, an example being integrals over surfaces and subdomains. Unfortunately, the function values of the solution are not accessible via dialog boxes. Instead, one has to rely on the solution plot. If you are moving the cursor over the solution graph, values of the solution are displayed in the lower left corner. If SNAP is set to on, only values on the grid defined in Axes/Grid Settingsare accessible. So either you switch off SNAPby double clicking on it, or you include the coordinates of the point you are interested in into the grid definition.
Help
Not really surprising, in this menu you will find a lot of help resources. I recommend that you read through the quick introduction. The user guide is rather long...
If you are more experienced, you can use Comsol Multiphysics from within MATLAB. Here, you have immediate access to solution values.
DONE
If you are ready or you want to interrupt your Comsol Multiphysics session, you can save your model using the File menu. I recommend to save it as an fl-file. The experienced user is probably more satisfied with an m-file because it is human readable. Then you can reload it at any time later modifying your model as you need.
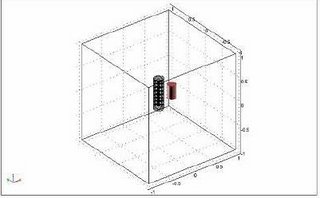
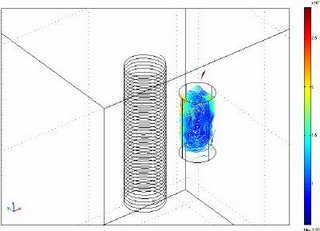
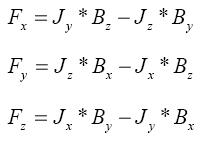 These force field are fed into the NS or K-e model as source term for obtaining the solution of the velocity field in the melt. The Modelling is then done as follows: